If you’re confused about how to properly address an envelope, don’t worry. Just follow these simple steps and you’ll get it right every time. Now learn how to address an envelope.
Step 1: Use the Correct Envelope Format
Before you write anything, make sure your envelope is clean and not crumpled. Doesn’t matter if it’s a green envelope or a white one, the layout stays the same.
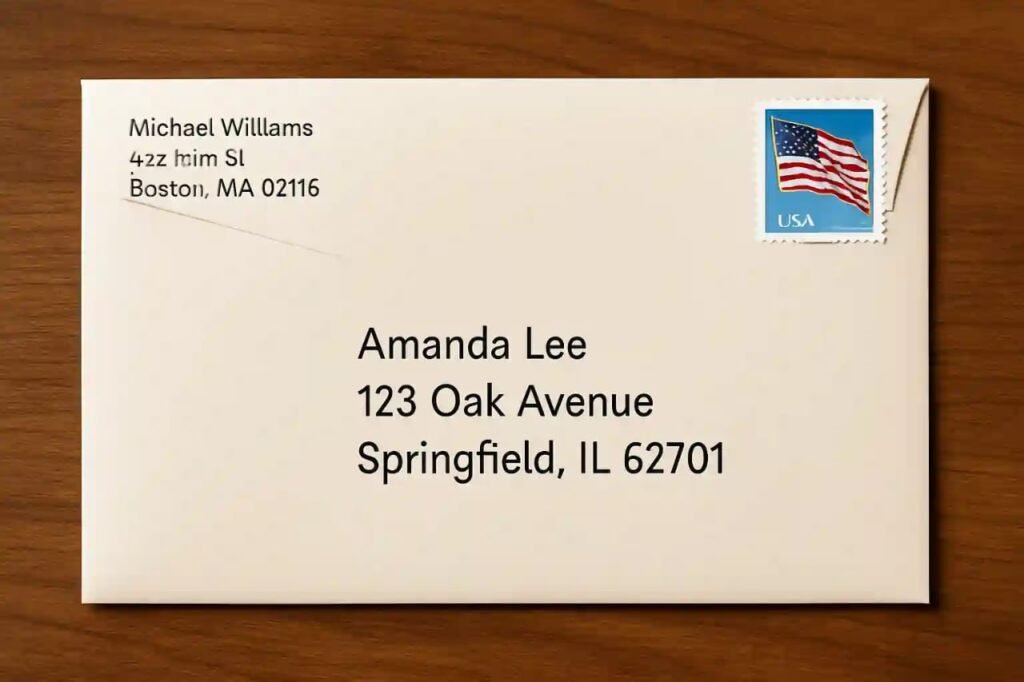
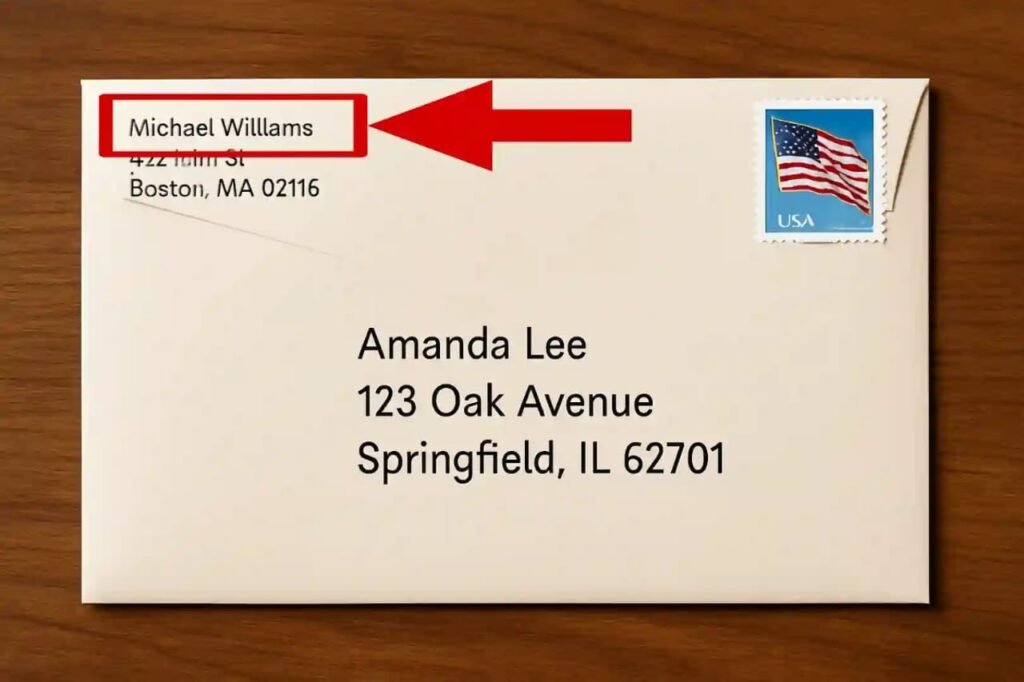
Step 2: Write Your Own Name (Sender’s Name)
Position: Top-left corner of the envelope.
Write your full name here. This tells the post office who sent the letter, and where to return it if delivery fails.
Example: Michael Williams
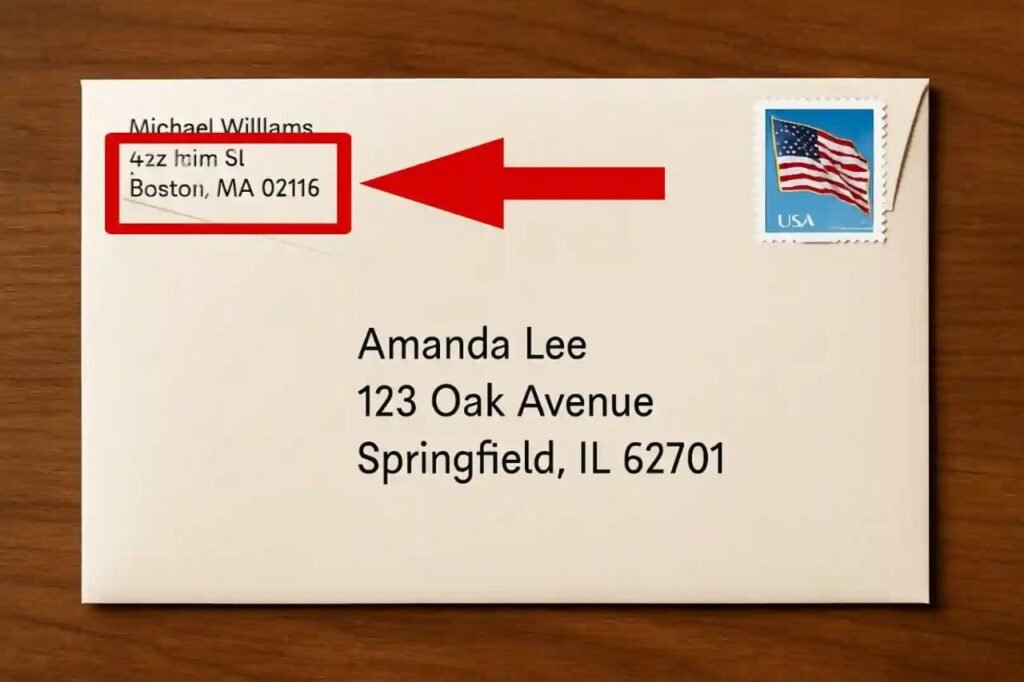
Step 3: Write Your Own Address (Return Address)
Position: Below your name, and still in the top-left corner.
Include:
- House number and street name
- Town or area
- City, postal code
- Country (if international)
Example:
42z st, Boston, MA, 02116
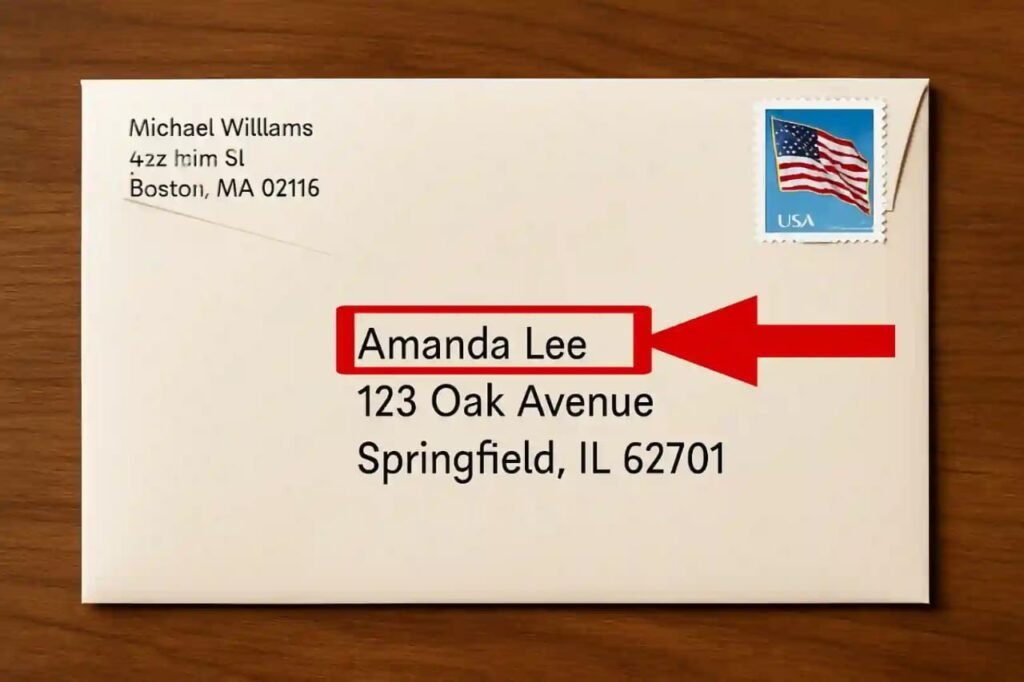
Step 4: Write the Recipient’s Name
Position: Middle of the Envalope
Name of the person you’re sending the envelope to
Example:
Amanda Lee
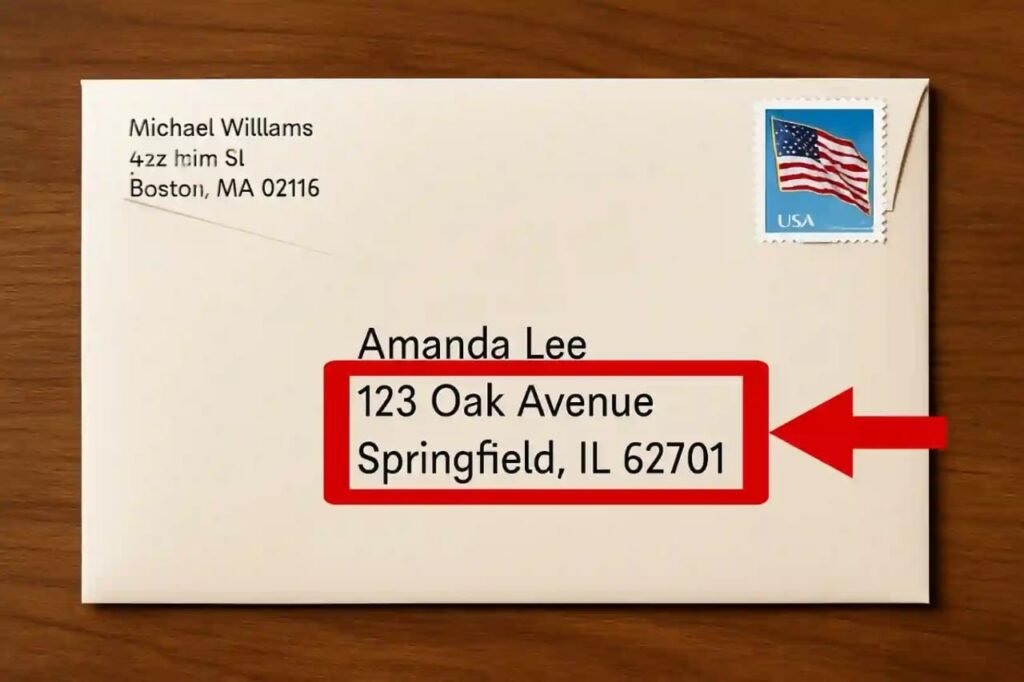
Step 5: Write the Recipient’s Address
Position: Under the recipient’s name, and still in the center of the envelope.
Include:
- House/apartment number and street
- Area or sector
- City and postal code
- Country (if international)
Example:
123 Oak Avenue, Springfeild, IL 62701
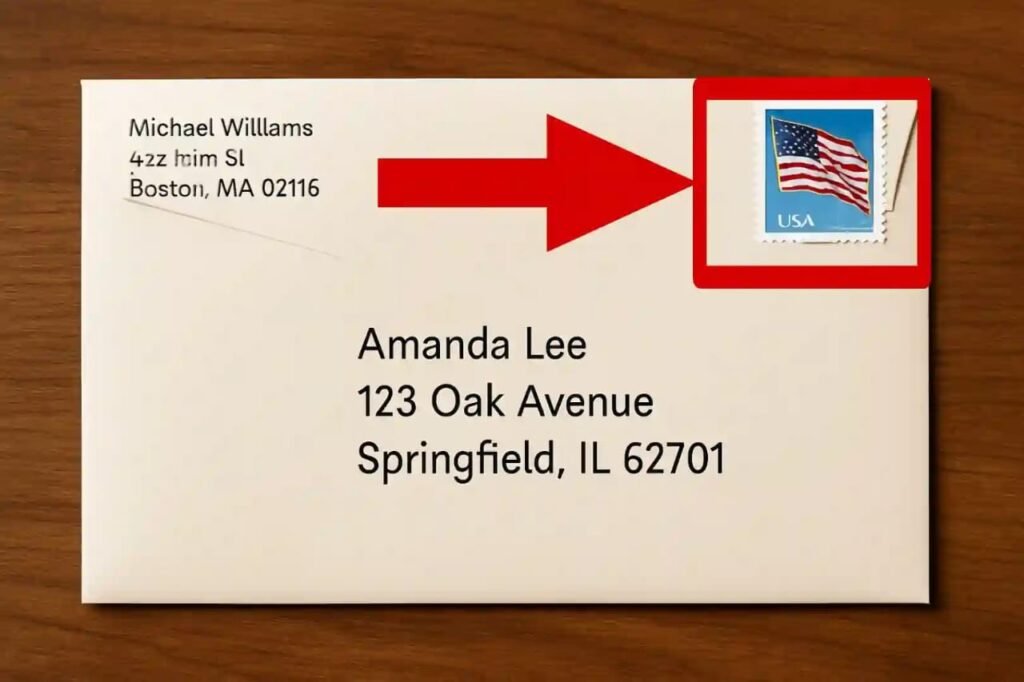
Step 6: Place the Stamp
Position: On top right corner of the envelope.
The stamp pays for the delivery. For local letters, one stamp might be enough. For heavier or international letters, check rates at the post office.
That’s it. No drama. No fluff. This is how you go about addressing an envelope the right way.
Use this same method for formal letters, wedding invites, job applications — anything.